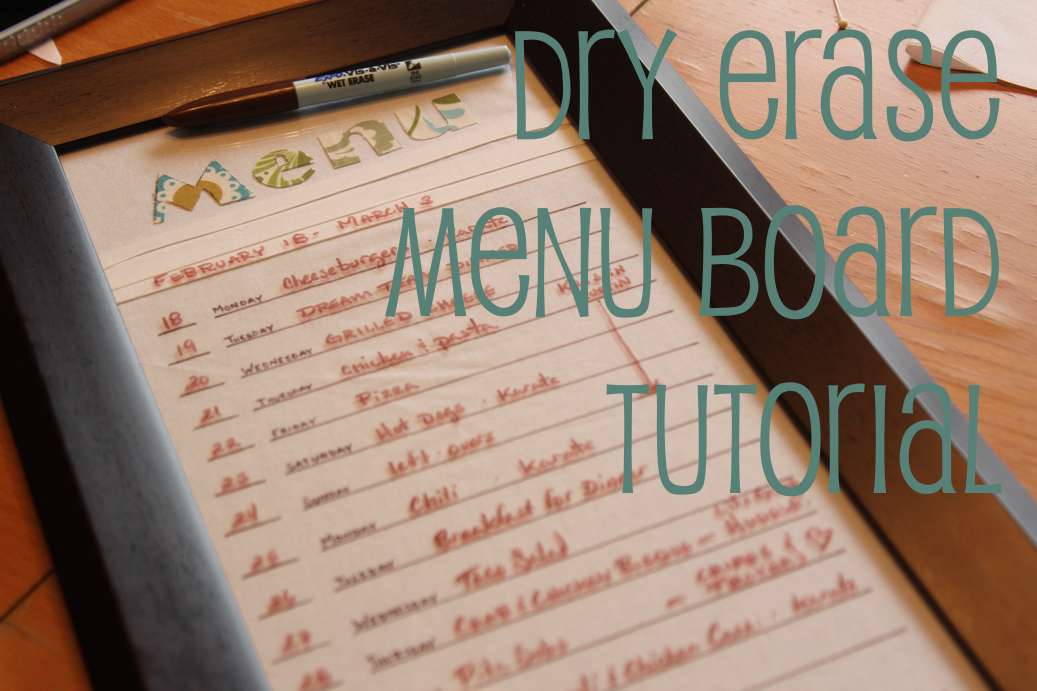
Did I really need a new dry erase menu board? Well, not if you define need as “wouldn’t survive without,” but if you saw the old one…you might call it a need too.
Here’s the menu board I’ve been using.
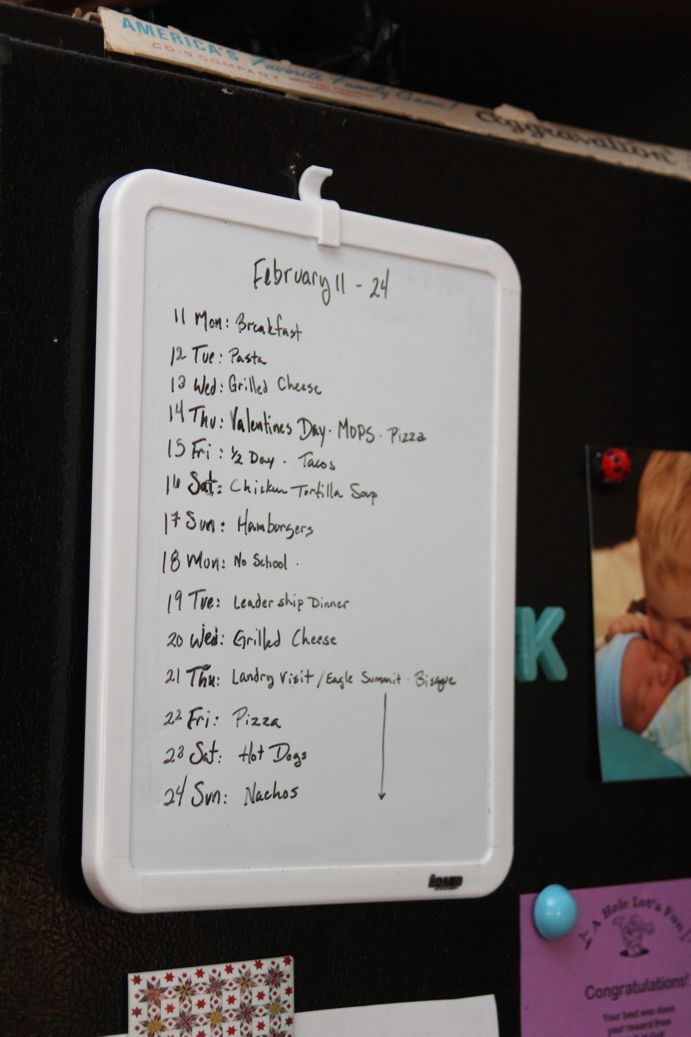
It’s fine really, it does the job.
Here’s what I DO like about it:
A) It is easy to use, I can change it out every two weeks and have a good reference that’s easy to see and plan around.
B) It’s a good system. I make this list every other Sunday night. From that menu I then make a shopping list every Sunday night and go shopping on Monday mornings. It’s one of the few working routines I have in my life. It’s kind of a miracle really.
Here’s what I DON’T like about it.
A) It’s ugly.
B) It’s too small.
C) The parts that I don’t ever change on the board, still get wiped away or smeared when I clean off the parts that do change.
D) No one in my family ever looks at it because it’s hanging on the side of the fridge where it’s only handy for me to see it.
E) It’s ugly.
So…I took the idea I saw here: Dry Erase Calendar Wall Art Tutorial (which isn’t really a tutorial…more of a “TA-DAH!” which is good too.) and I made one (well, I made one similar…I had to do it different because I’m that kind-a gal) and then I gave it away at MOPS because I really didn’t have a place to put it. Then I thought…why not make one I can really use, and it became my Menu Board.
Like this:
1) Lay out the fabric and cut to size. First I tried this cream fabric from another project that I thought would look really nice under glass because of it’s texture.
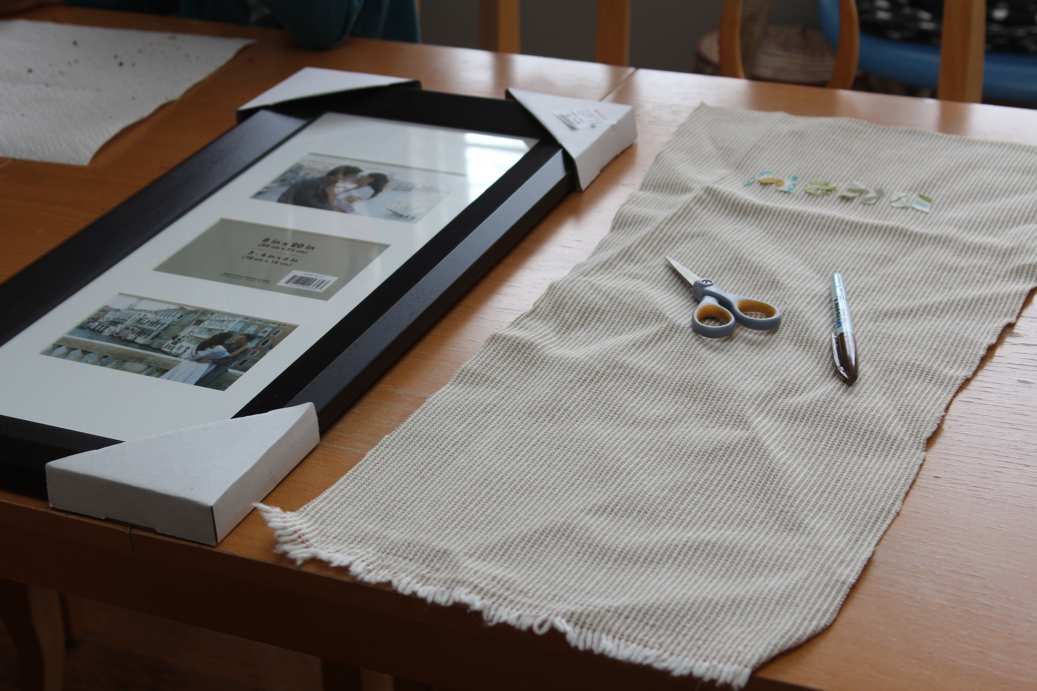
2) Test the marker on the fabric. I doodled a bit on the bottom where it wouldn’t show to see if the marker itself would a) show up, and b) write legibly on the rough surface.
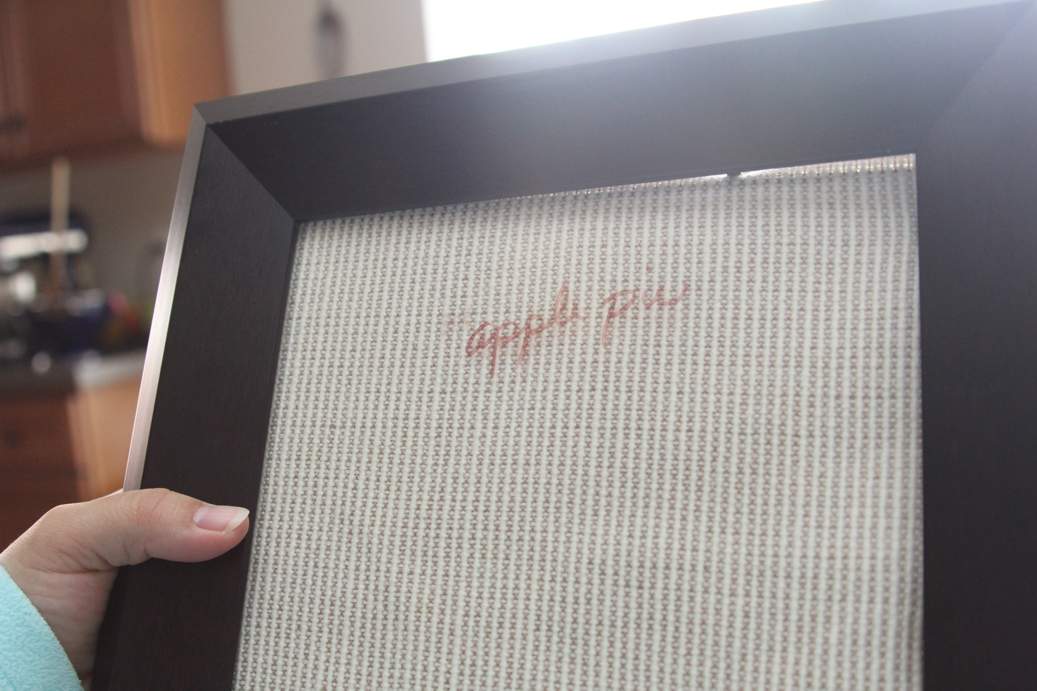
3) Cut the fabric to size. I cut my fabric about an inch larger on all sides than the mat that was in the frame. That gives me plenty of fabric to wrap around the outside and fit the fabric and frame backing into the frame itself.
4) Test the marker on the glass. I set the fabric and backing into the frame gently and then wrote on the glass. I didn’t like it. The texture of the fabric was just too busy for the marker I wanted to use. So…I went back to step 1) with a different fabric.
We’ll just pick up at step 5).
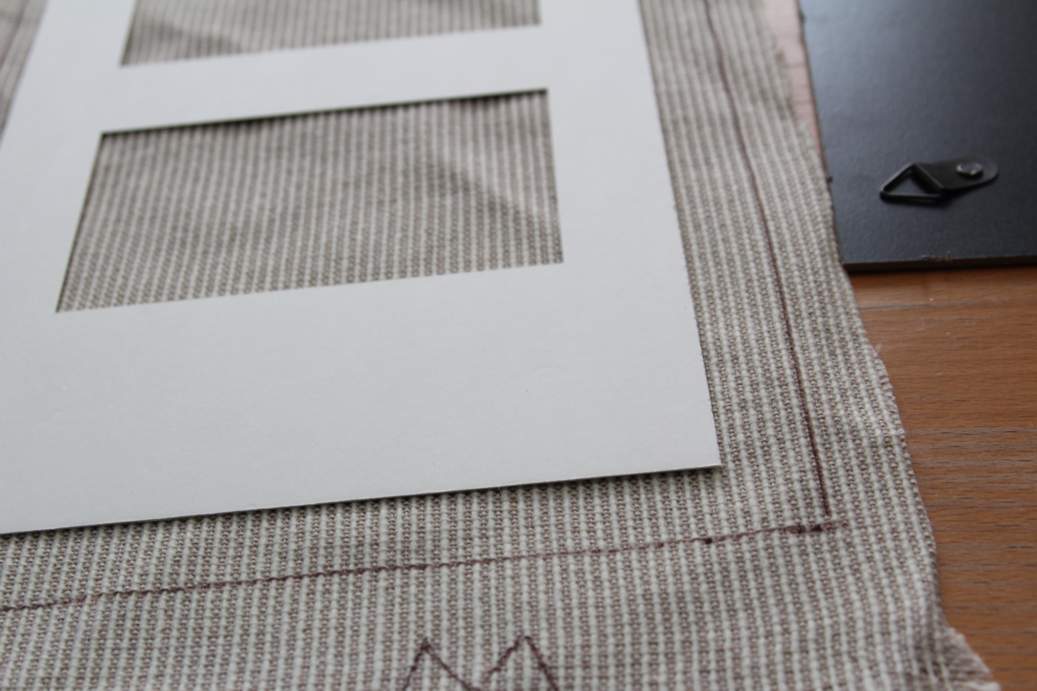
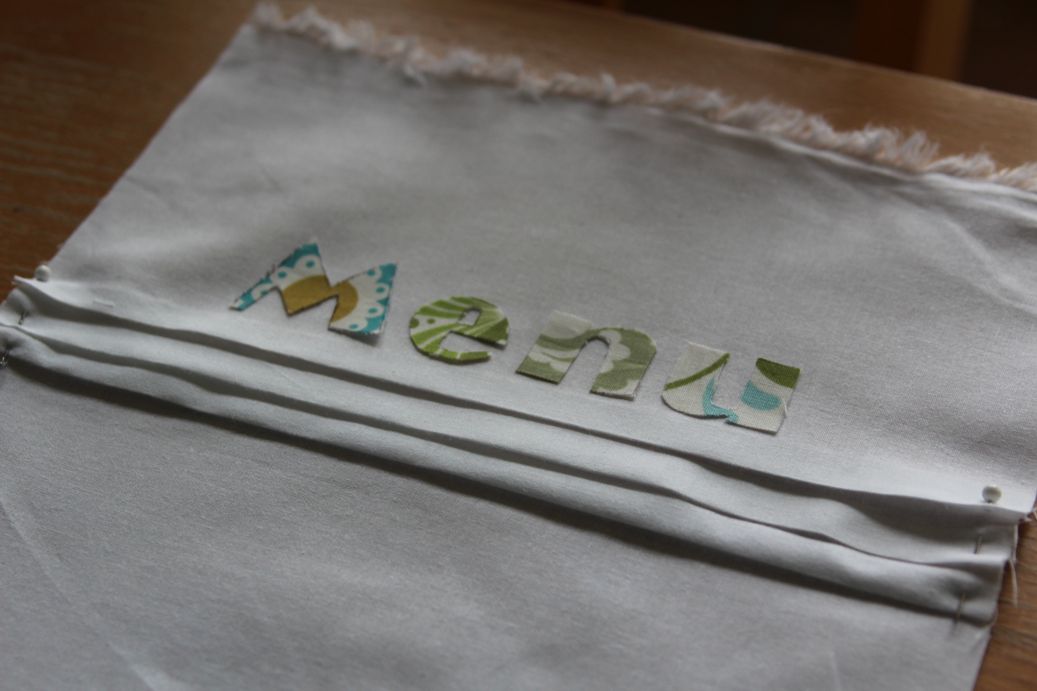
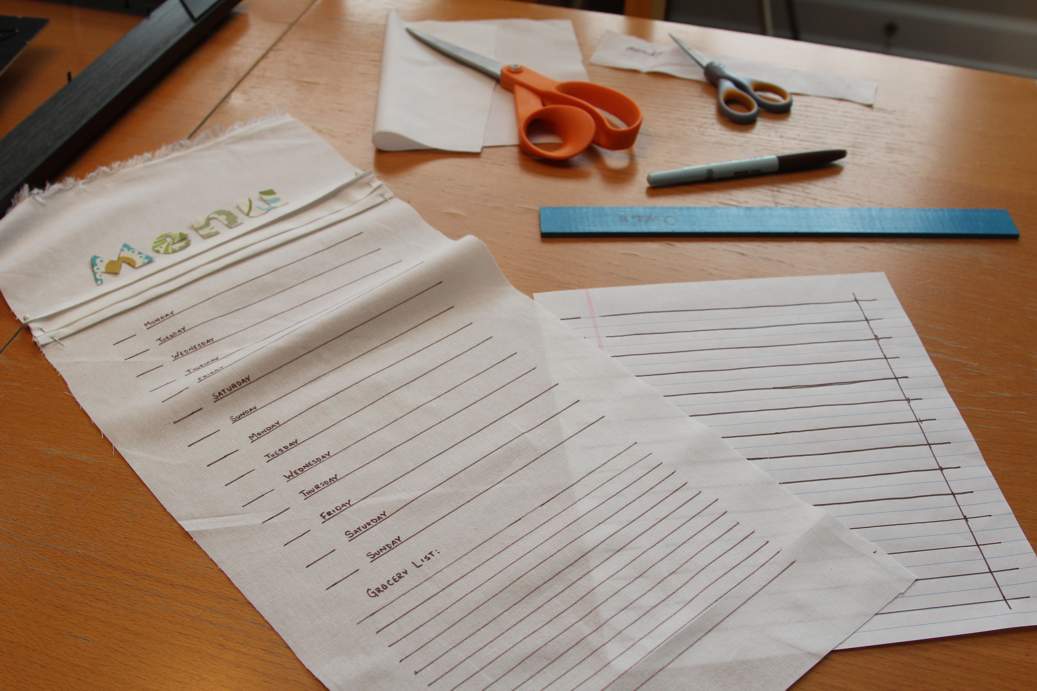
5) After picking a simple fabric I found the marker worked much better on it and I decided to try to get fancy. I ironed in some pleats. I regret this. Well, I regret not stitching the pleats. You’ll see why when I’m done. I cut out my “MENU” from a cute and colorful fabric and wiped just a tiny bit of glue on the back so they’d stick long enough to get them into the frame.
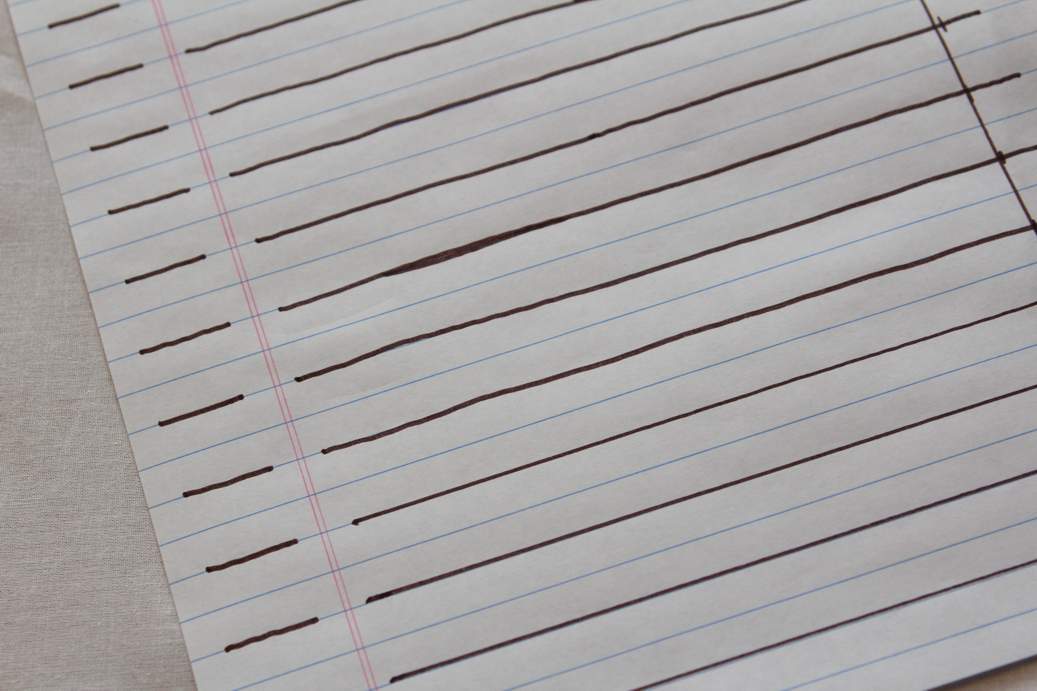
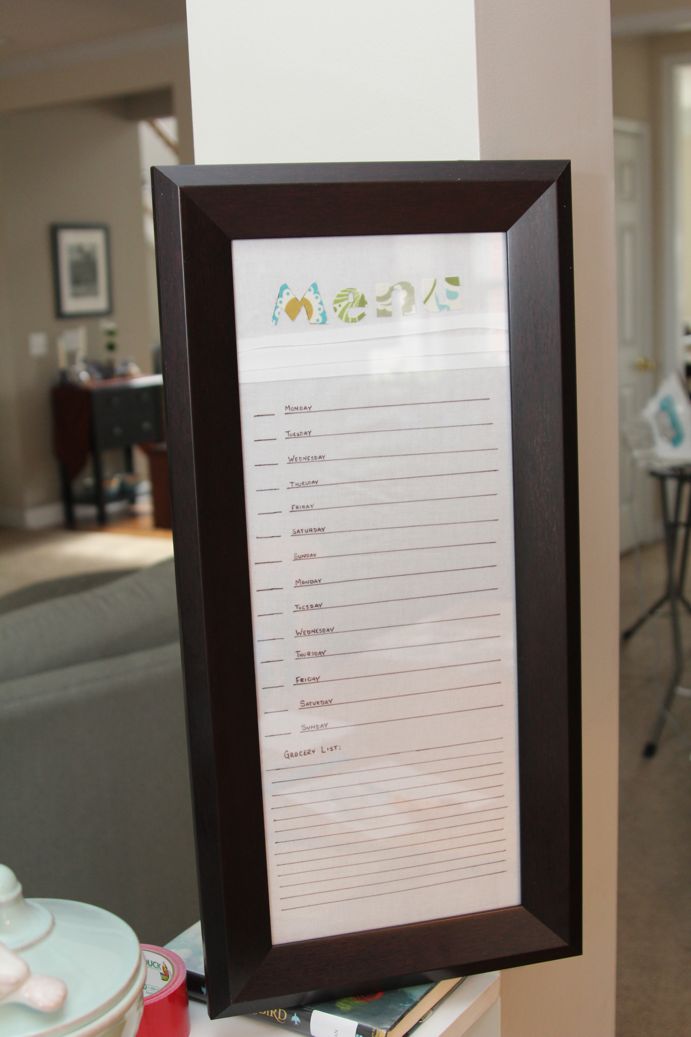
6) Next, I used a piece of notebook paper to draw out my lines. By tracing lines already perfectly spaced, I was able to avoid any user errors with pen and ruler on fabric. The little short lines are to write in the date for each day and the long lines are for weekday and writing in the menu item for the day.
7) I then used the paper to trace the lines onto the fabric. The dark lines show through beautifully and all I had to do was line my ruler up with them to ensure the lines on the fabric remained straight.
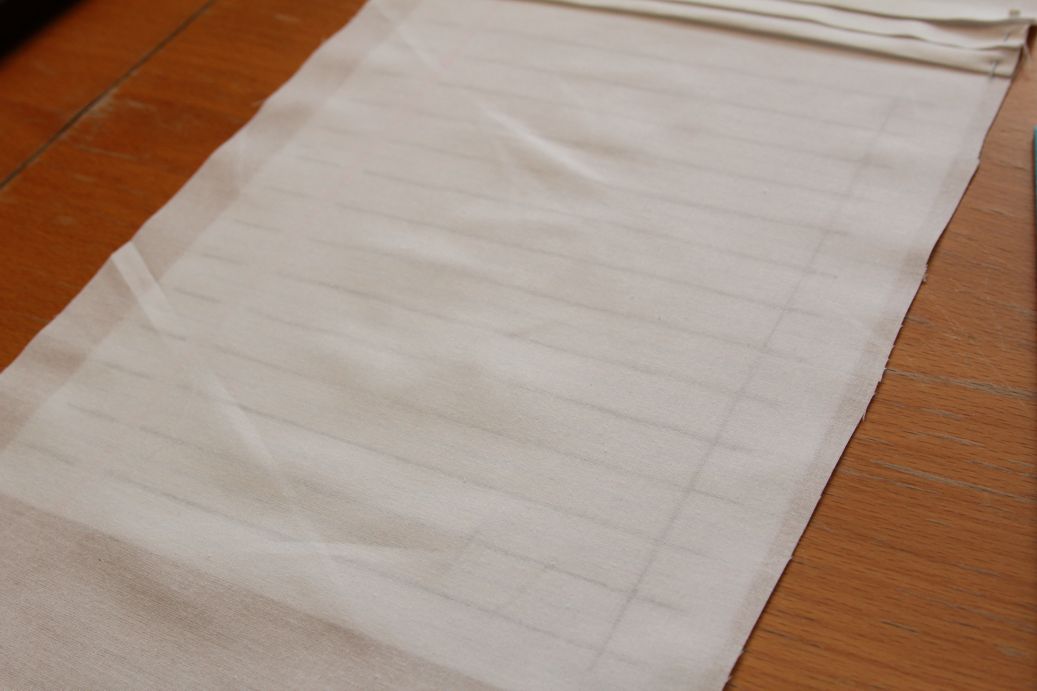
8) Once the lines were drawn I wrote the days of the week small and careful onto the long lines. Because I bought a nice long frame I also had room for a grocery list right below. I used the same lined paper I had used before but moved it as I traced lines to allow for more lines in the frame.
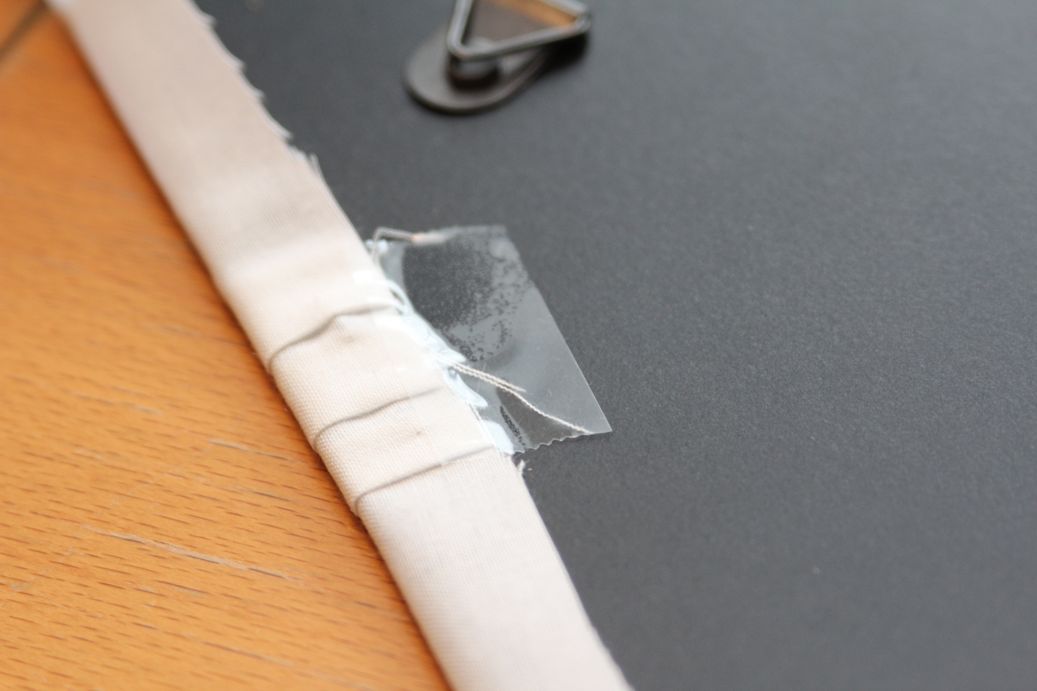
9) As well as I could, I centered the fabric onto the backing board of the frame.
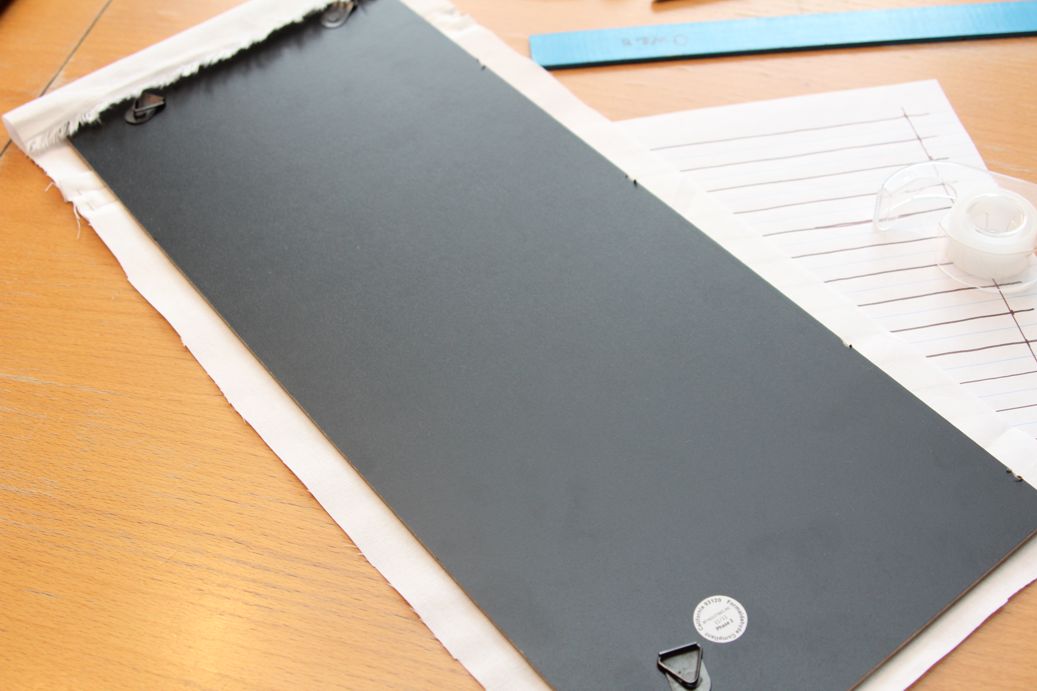
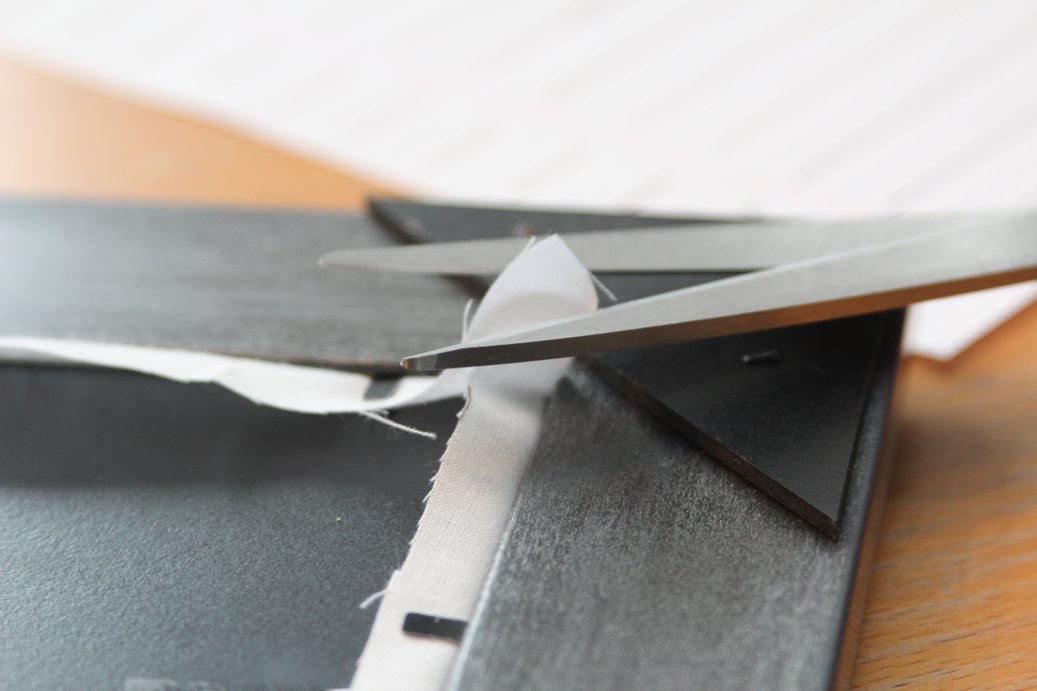
10) I used tape to keep it from sliding around while getting the frame in place. I tried especially hard to keep the pleats lined up, not removing my pins until they were taped in place. I also clipped the corners with my scissors so the fabric wouldn’t produce too much bulk behind the frame or get in the way of hanging it.
11) Finished! See how my pleats still got wobbly? I don’t like that, but I also don’t want to start over. I am calling it “good enough” and trusting that no one else will make the same mistake I did.
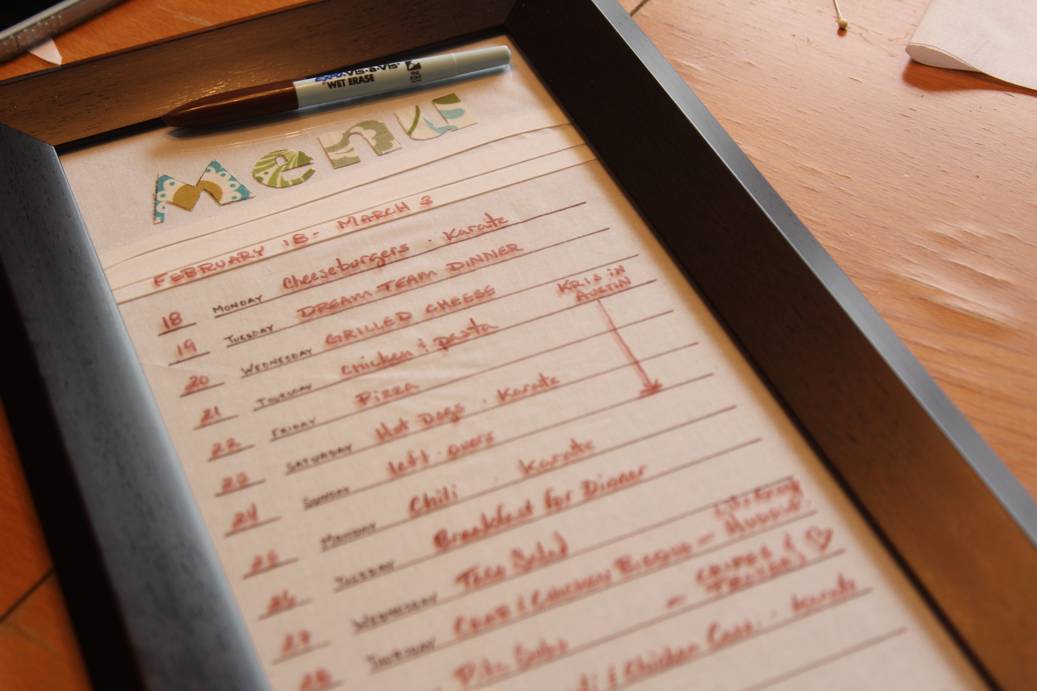
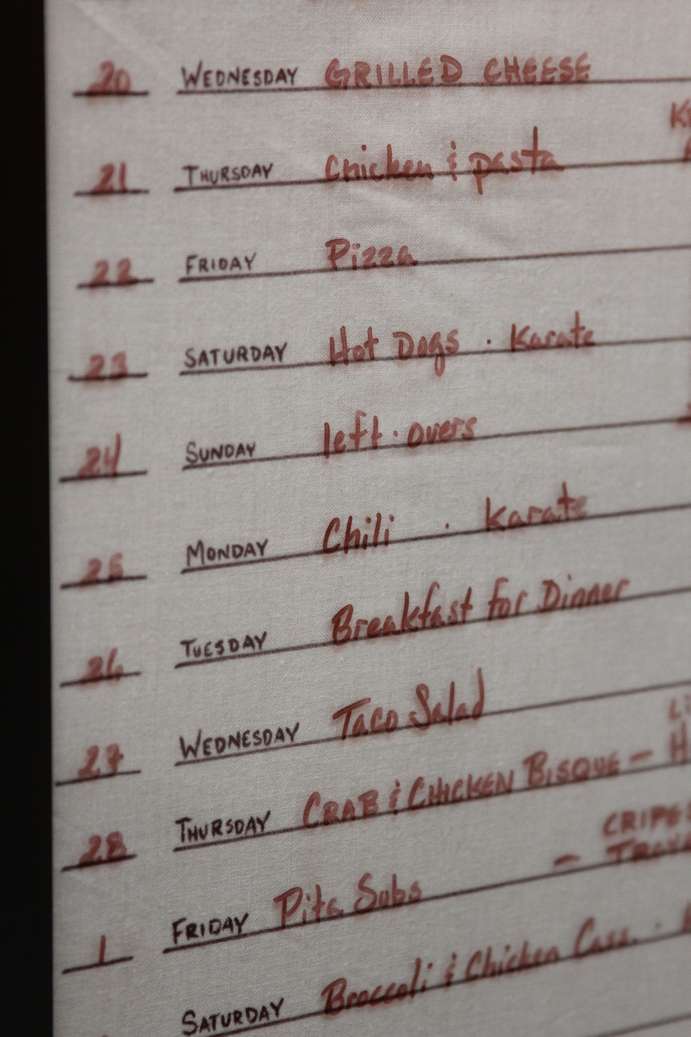
12) Using a WET erase marker, not a dry erase, I filled in my menu. The advantage of a wet erase is that it won’t smudge if someone decides to make a note later, or rub their shoulder against it while it’s on the wall. I have to purposely wipe it off with a wet paper towel to make it go away, and when I do, it’s quite easy.
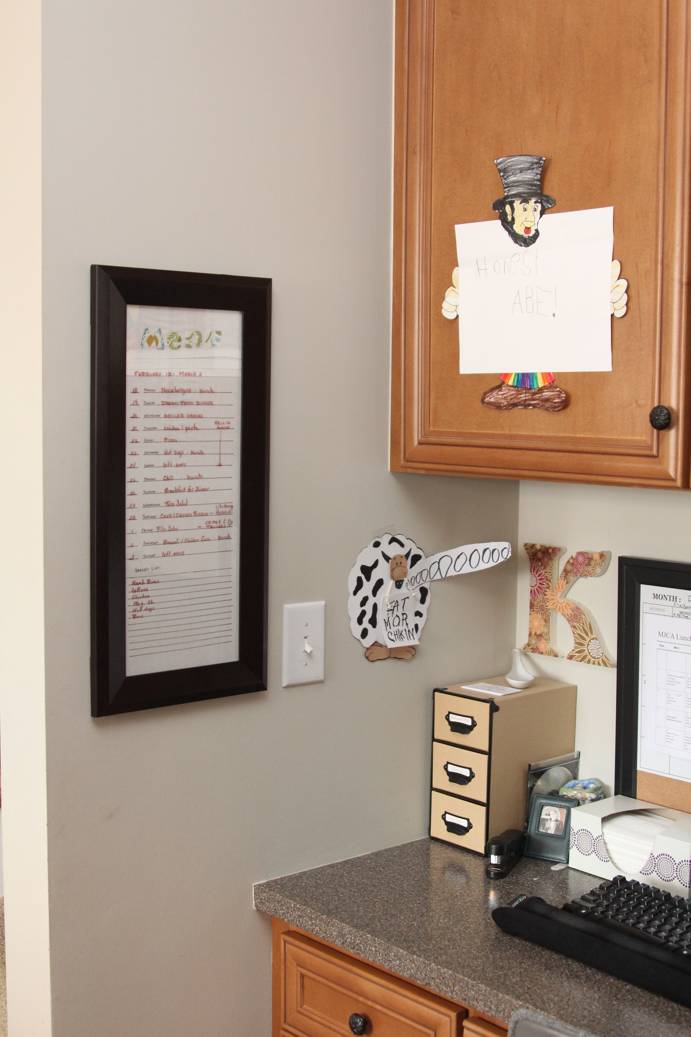
13) Here it is hanging in the kitchen. I have little to no wall space in my kitchen, everything is either cut out, holding cabinets up or has a window in it. Long and narrow works pretty well and this spot is near all of Ivan’s artwork. Honest Abe likes my menu board. He got all dressed up in rainbow pants to celebrate.
14) There it is…easy to use, easy to change. I’m so happy I could eat a Pita Sub…WooHoo! That’s what’s for dinner tonight!
i love this! I would pay you to make me one.
I love that you improved on something you already use regularly. I see things like this and buy them because they’re a good idea or because it’s cute and never end up using it. Like the dry erase chore chart I bought that’s never been used for anything but for the girls to draw on. Or the activity chart that has been blank for the last two years but it still sits on the side of the fridge 🙂
I have thought about making a menu…we’ll see how that goes.
I am the same way, Amy. It is just too difficult to keep up with a system that is too generic. I feel like I’m spending half my time keeping up and half my time adjusting it to our way of doing things. I too, have an empty chore chart hanging up in the laundry room and I finally took down the cards I was using.
The menu has been working for a long time and it all started with a tiny blank whiteboard. We are going to have to find something that works for the boys because I’m not doing well with the chore thing. Or maybe they are not doing well with the chore thing. Somebody isn’t doing well with the chore thing. 🙂